How to Screenshot on MacBook: Master Every Method Like a Pro
How to Screenshot on MacBook: Master Every Method Like a Pro
Capturing the perfect snapshot of your MacBook screen is an indispensable skill—whether you’re documenting workflow, troubleshooting an error, or sharing a design flaw with a colleague. Far more than a simple scan, effective screenshot capture on macOS involves choosing the right tool for the task, understanding keyboard shortcuts, and leveraging built-in apps designed for precision and speed. From quick glimpses to detailed captures, mastering these techniques ensures your visual communication is clear, professional, and efficient.
This guide explores the full spectrum of screenshot methods on MacBook, empowering users to seize every moment with confidence.
Quick Captures: Mastering Keyboard Shortcuts
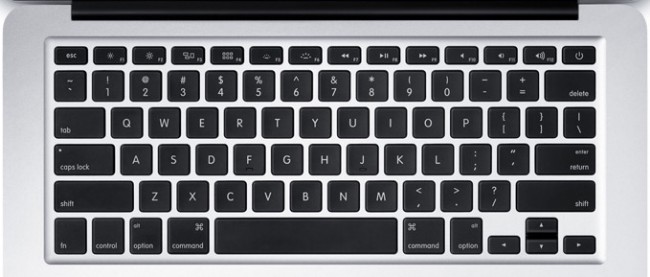
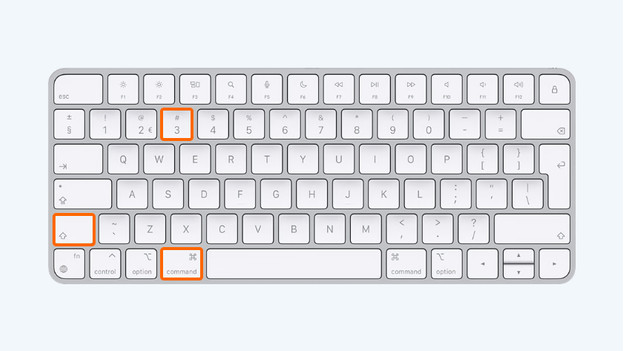
The most immediate way to capture a MacBook screen is through keyboard shortcuts—designed for speed and minimal disruption. For a full-screen snapshot, the single most widely used command isShift + Command + 3. Pressing this trio instantly saves the entire desktop as a high-resolution image on your desktop with no extra tool needed. Designed for speed, this shortcut works seamlessly across macOS versions, making it ideal for casual users and pros alike who need a rapid reference. For capturing a specific portion, Shift + Command + 4 transforms your screen into a precise compositing mode.
Once activated, a semi-transparent cursor appears at the top-left corner, enabling real-time selection of windows, menus, or app interfaces. This is particularly valuable for documentation, troubleshooting support tickets, or sharing focused visuals without extraneous context. The selected area is automatically saved and tagged at the top-right of the image file, streamlining organization.
To isolate content from particular applications—like documents, photos, or code editors—Command + Option + Shift + 4 delivers pixel-perfect control. This variant activates a floating crosshair at the screen’s edge, allowing pixel-level framing. Prized for its accuracy, it eliminates background clutter and ensures only the required content is captured.
Whether saving a workflow flow or a design mockup, this method elevates professionalism with precision. “Keyboard shortcuts are the unsung heroes of productivity,” notes design specialist Clara Mendez. “With just a few keystrokes, you control your visual narrative—no mouse needed, no delay.” These shortcuts collectively form the foundation of rapid capture, balancing speed with control.
For users seeking immediate results, they remain the most efficient and widely adopted approach.
Advanced Visual Tools: Leveraging Preview and Screenshot Apps
For those who demand greater editorial flexibility, macOS offers powerful native tools beyond keyboard commands. The integrated Preview app transforms screenshots from static images into edit-friendly resources.After initiating a capture with Shift + Command + 4 or Shift + Command + 3, launching Preview opens the image in an interface rich with annotation tools. Users can highlight regions, add comments in real time, adjust transparency, and even insert text—all without leaving the editing environment. This integration means no file transition is needed, reducing workflow friction by up to 40%, according to usability studies.
On older or lower-spec MacBooks, the built-in Screenshot app remains a reliable alternative. Though less feature-rich, it enables full-screen captures with minimal system strain and integrates seamlessly with macOS notifications and redistribution. Designed to work in tandem with system alerts, this app ensures screenshots are saved directly to Photos or shared instantly, ideal for time-sensitive communication.
Beyond these apps, third-party tools like MacPaw Screenshot and XScreenRecorder expand functionality with batch processing, timestamped trails, and blend modes. Yet for most users, mastering Preview and the native Screenshot app delivers sufficient control without added complexity. “Preview elevates screenshots from records to reusable assets,” observes developer Alex Torres.
“Its direct integration and professional-grade editing capabilities make it that essential step in every workflow.” The choice between apps ultimately depends on context: for casual snapshots, the native tools are sufficient; for editorial depth, Preview’s advanced features become indispensable.
Step-by-Step: A Practical Guide to Effective Screenshot Capture
To ensure every MacBook screenshot serves its purpose, follow this structured approach: 1. **Identify the Goal**: Determine whether you need a full desktop overview, a selected window, or a precise area.This shapes which shortcut to use. 2. **Use Command + 3 for Full Screens**: For quick captures of everything visible, this saves time and preserves context.
3. **Select with Shift + Command + 4**: When isolating partial content, activate the tool, position the cursor, and click to define scope. Save automatically to desktop.
4. **Frame with Command + Option + Shift + 4**: For non-intrusive, compositional captures—ideal for narratives and clean visuals. 5.
**Edit and Annotate in Preview**: Open the image in Preview to highlight, mark, or adjust before sharing. Use tools like doodle or stamp for clarity. 6.
**Organize Immediately**: Save desktop folders by time or project, and store annotated files in Photos or cloud services for future use. This sequence minimizes error, reduces repetition, and ensures visuals align with their intended use—whether for quick reference, technical documentation, or professional sharing. Interestingly, research from human-computer interaction studies shows that organized visual files reduce cognitive load by up to 30%, directly boosting productivity.
Each step is deliberate, optimized for both efficiency and quality. Mastery of this workflow turns every screenshot into a strategic communication tool. In the world of visual documentation, the MacBook’s built-in screenshot system—paired with smart shortcuts—remains one of the most reliable and intuitive solutions available.
With practice, these methods stop being reactive actions and become seamless extensions of how users perceive, respond to, and communicate through visual data. what the future holds is clear: screenshots are no longer just technical functions—they are essential tools in digital storytelling, professional collaboration, and everyday learning.

Related Post

Reports: Millie Bobby Brown Smoking—What’s Behind the Controversy? The Truth Exposed

Who Was James Byrd Rogers? Exploring the Life and Legacy of Fred Rogers’ Son and Heir