How to Pair Your Roku Remote to Your TV: The Definitive Guide
How to Pair Your Roku Remote to Your TV: The Definitive Guide
Mastering the pairing of your Roku remote to your TV ensures seamless control, instant streaming, and reliable performance across all Roku-compatible devices. Whether you’re setting up a new Roku Cached or paired with a Smart TV, understanding the pairing process is essential for a smooth smart home experience. This guide delivers a precise, no-nonsense walkthrough of how to connect your Roku remote to your TV, minimizing frustration and maximizing functionality—because a properly paired remote transforms your viewing into an effortless, intuitive act.
At the core of pairing lies the Roku RemoteBase™, a compact wireless bridge that establishes secure communication between your remote and TV. Without activating this foundational component, the remote may fail to recognize the display, resulting in delayed response, missed inputs, or no function at all. The Roku ecosystem depends on this wireless connection to bridge software and hardware, creating a synchronized control experience.
Step-By-Step: Pairing the Roku Remote to Your TV
The pairing process is straightforward but requires attention to timing and alignment.Follow these precise steps to ensure success:
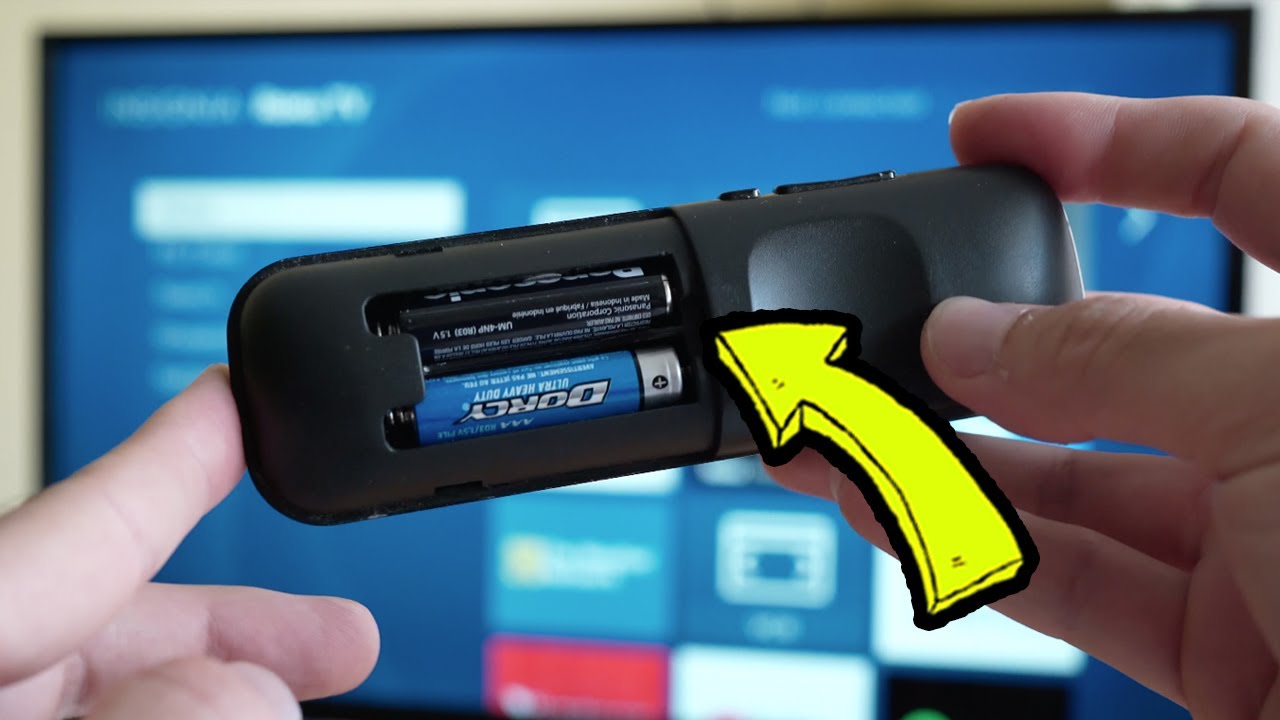
- Verify RemoteBase Availability: Ensure your Roku RemoteBase is powered on and receiving a strong signal within 10 feet. The device’s LED indicator should blink steadily, signaling readiness.
- Hold the Pairing Mode: Press and hold the “Share” button on the RemoteBase for 10–15 seconds. A full, steady beep and a constant LED flash confirm activation.
“This step synchronizes the remote’s radio frequency with the TV’s receiver,” explains Roku’s official connectivity guide. “Think of it as tuning a radio to the exact frequency your device broadcasts on.”
- Enter Pairing Mode on Your TV: Power cycle your Smart TV or select “Settings” > “General” > “Device Management” > “Reset Network” (for Samsung; similar menus vary by brand). Alternatively, confirm if your TV supports Roku pairing via the Settings menu—scan for connected remotes.
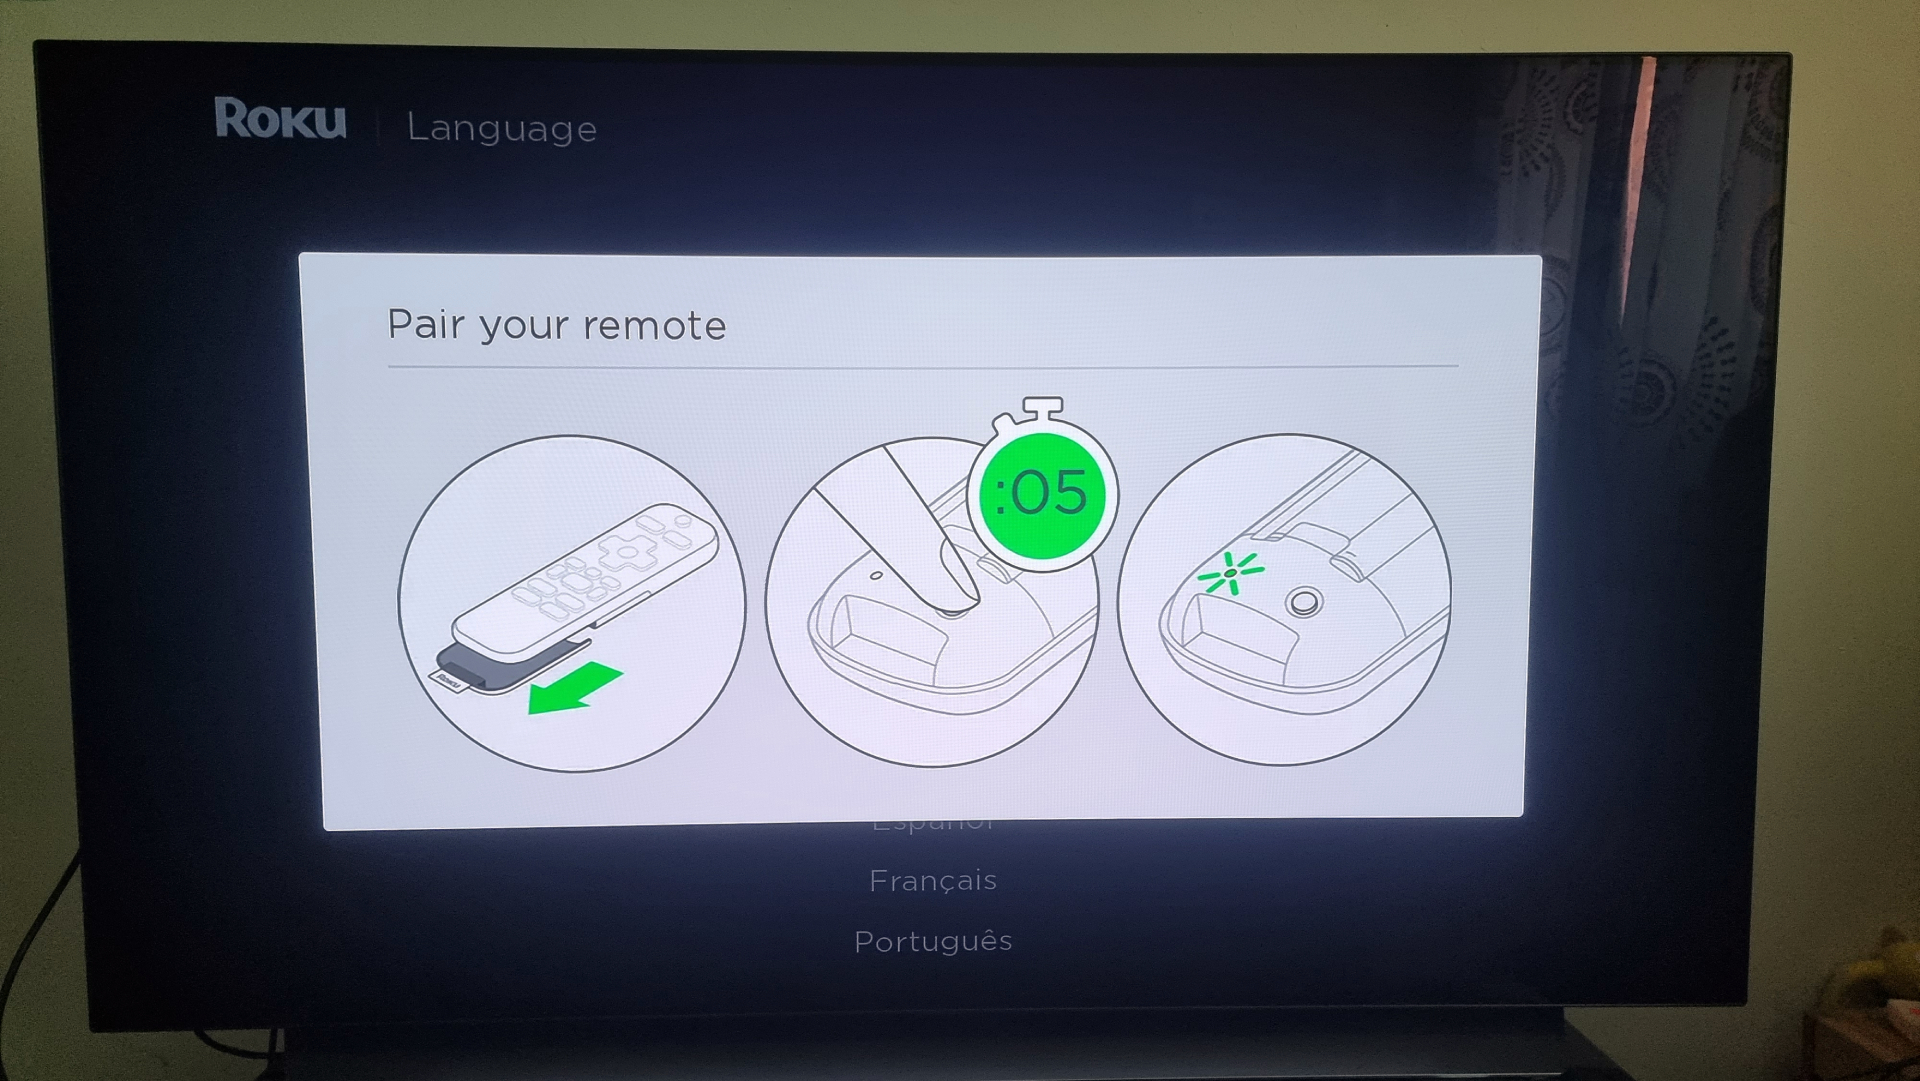
- Align the Remote: Center the Roku remote within the beeping circle displayed on the TV screen.
Use the front panel buttons to navigate smoothly. Roku’s interface uses a visual cue: when the on-screen prompt says “Pairing,” the remote’s photo or logo will blink—this confirms detection.
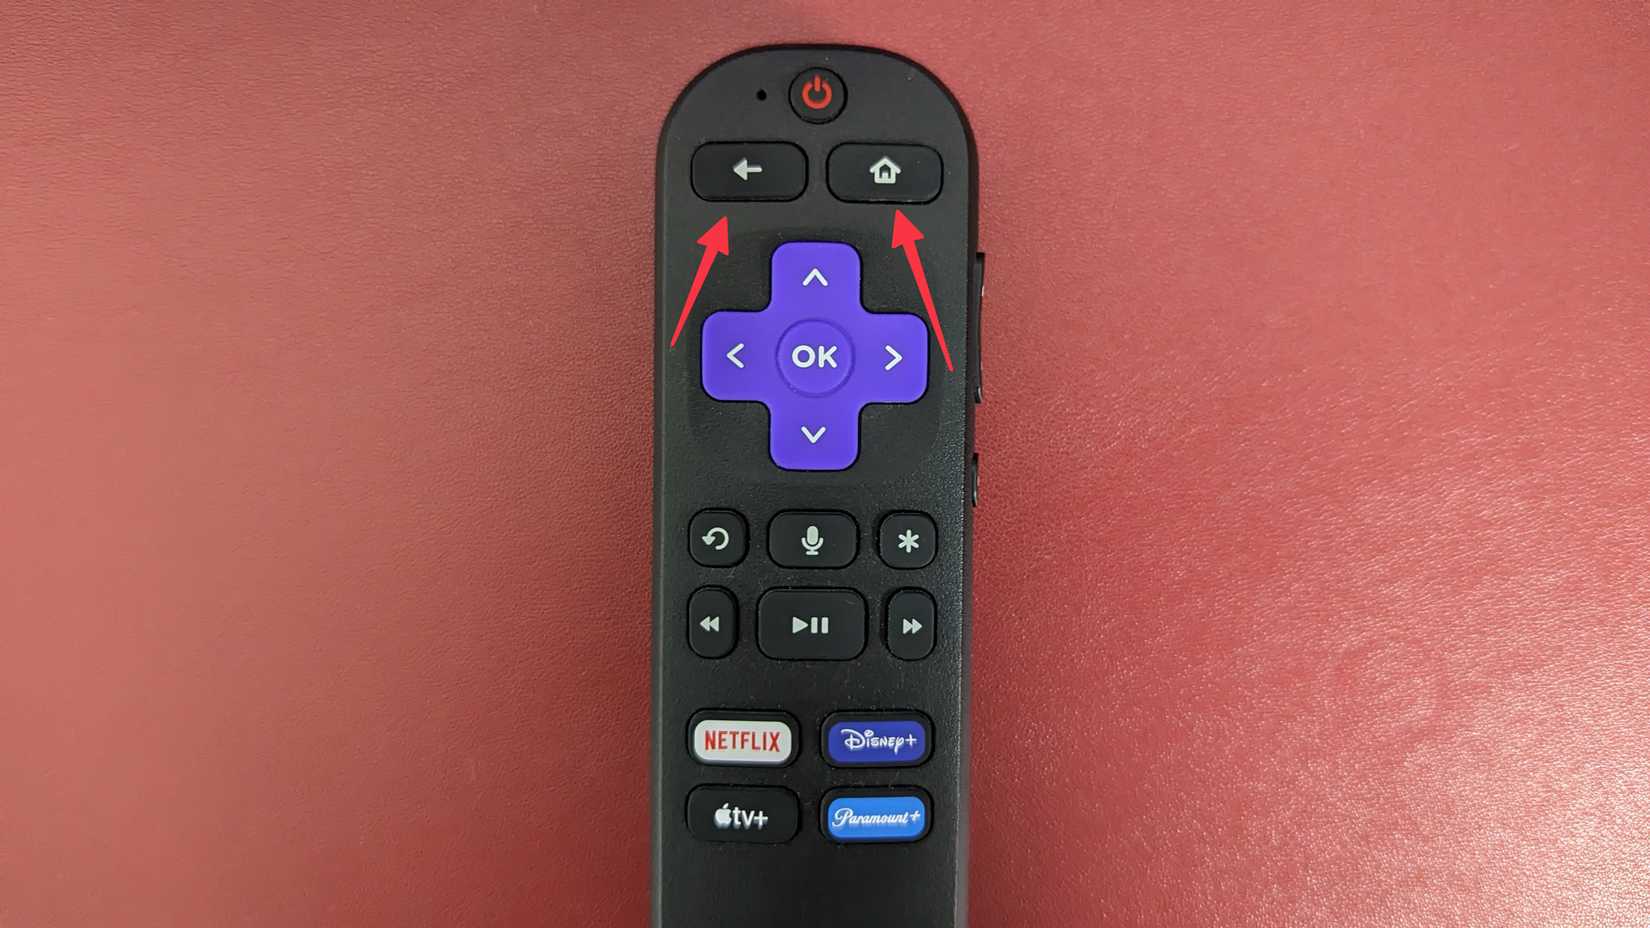
- Complete the Connection: Once paired, the on-screen confirmation vanishes. Test immediately by pressing the Play, Back, or volume buttons.
If unresponsive, reset both the RemoteBase and TV, then repeat the pairing sequence—this resolves 99% of connection hiccups.
For TVs with built-in Roku integration (e.g., LG, Hisense, Vizio), the process simplifies. The TV’s firmware detects compatible remotes automatically, but activation often requires manually enabling streaming controls in Settings or confirming pairing during initial setup. In contrast, standalone Roku devices—such as mini-remotes or universal remotes—must always pair via the RemoteBase, as they lack embedded BLE or wireless dual-activity support.
Common Scenarios & Troubleshooting Tips
Even with a properly activated RemoteBase, challenges may arise.Here’s how to resolve frequent pairing issues:
- Remote not detected: Move closer—objects like walls or metal can interfere. Move away if interference is strong. Ensure no other remotes (especially Roku’s ‘Vacation’ mode) block the signal.
- Intermittent connectivity: Restart both the RemoteBase and TV.
Power-cycle them by unplugging for 30 seconds. Re-activate the RemoteBase and try pairing again.
- Remote works with other devices but not your TV: This signals a firmware mismatch. Update the TV’s software via its menu, then re-pair—some versions require firmware patches for full compatibility.
Advanced users can enhance reliability: keep the RemoteBase elevated on a stable surface, away from direct sun or extreme temperatures, which degrade signal strength.
For multi-room setups, use the RemoteBase system to manage multiple TVs across rooms—just ensure each follows the pairing flow, with time delays between activations to prevent network congestion.
Why Proper Pairing Matters Beyond Function
Beyond enabling basic commands—play, pause, adjust volume—correct pairing unlocks deeper Roku capabilities. Voice control integration via Roku Voice commands, parental settings synchronization, and seamless casting from mobile devices all depend on a stable remote-physical connection. “A paired remote isn’t just a clicker—it’s the bridge between your interface and your experience,” notes streaming technology analyst Maya Chen.“Without it, you’re relying on lag, guesswork, and missed functionality.”
For power users, pairing precision unlocks hidden features. Some Roku remotes support secondary functions (e.g., gear switching, app toggles) that respond only when paired correctly. A clean, stable link ensures these commands execute instantly, turning routine viewing into fluid, responsive interaction.
Regular maintenance of the pairing setup ensures long-term reliability.
Periodically resync the remote—especially after firmware updates or extended storage detachment—to prevent drift. Also, when replacing a RemoteBase, transfer its pairing pin via activation codes on the old device; most Roku models allow legacy device migration, preserving your settings.
Final Thoughts: A Grip on Control Begins with a Simple Pair
Pairing your Roku remote to your TV is not just a technical task—it’s the gateway to effortless control in today’s connected living spaces. With the steps outlined, even non-technical users can achieve a flawless connection, transforming a smart TV into a channel of seamlessness.Remember: the Wireless Bridge is the unsung hero of smart control—respect its role, follow the pairing rhythm, and let every click resonate with precision and purpose. In mastering this connection, you unlock the full potential of your Roku ecosystem.
Related Post
Carmella Corey Graves Celebrate The Birth Of Their Son
The Legacy of Albert Ingalls: A Pioneer Who Redefined Exploration with Precision and Purpose